


I love this project. It’s so easy and cute and versatile. Despite my love-hate relationship with fleece, there’s no denying that its warmth and softness are perfect for baby and toddler projects.
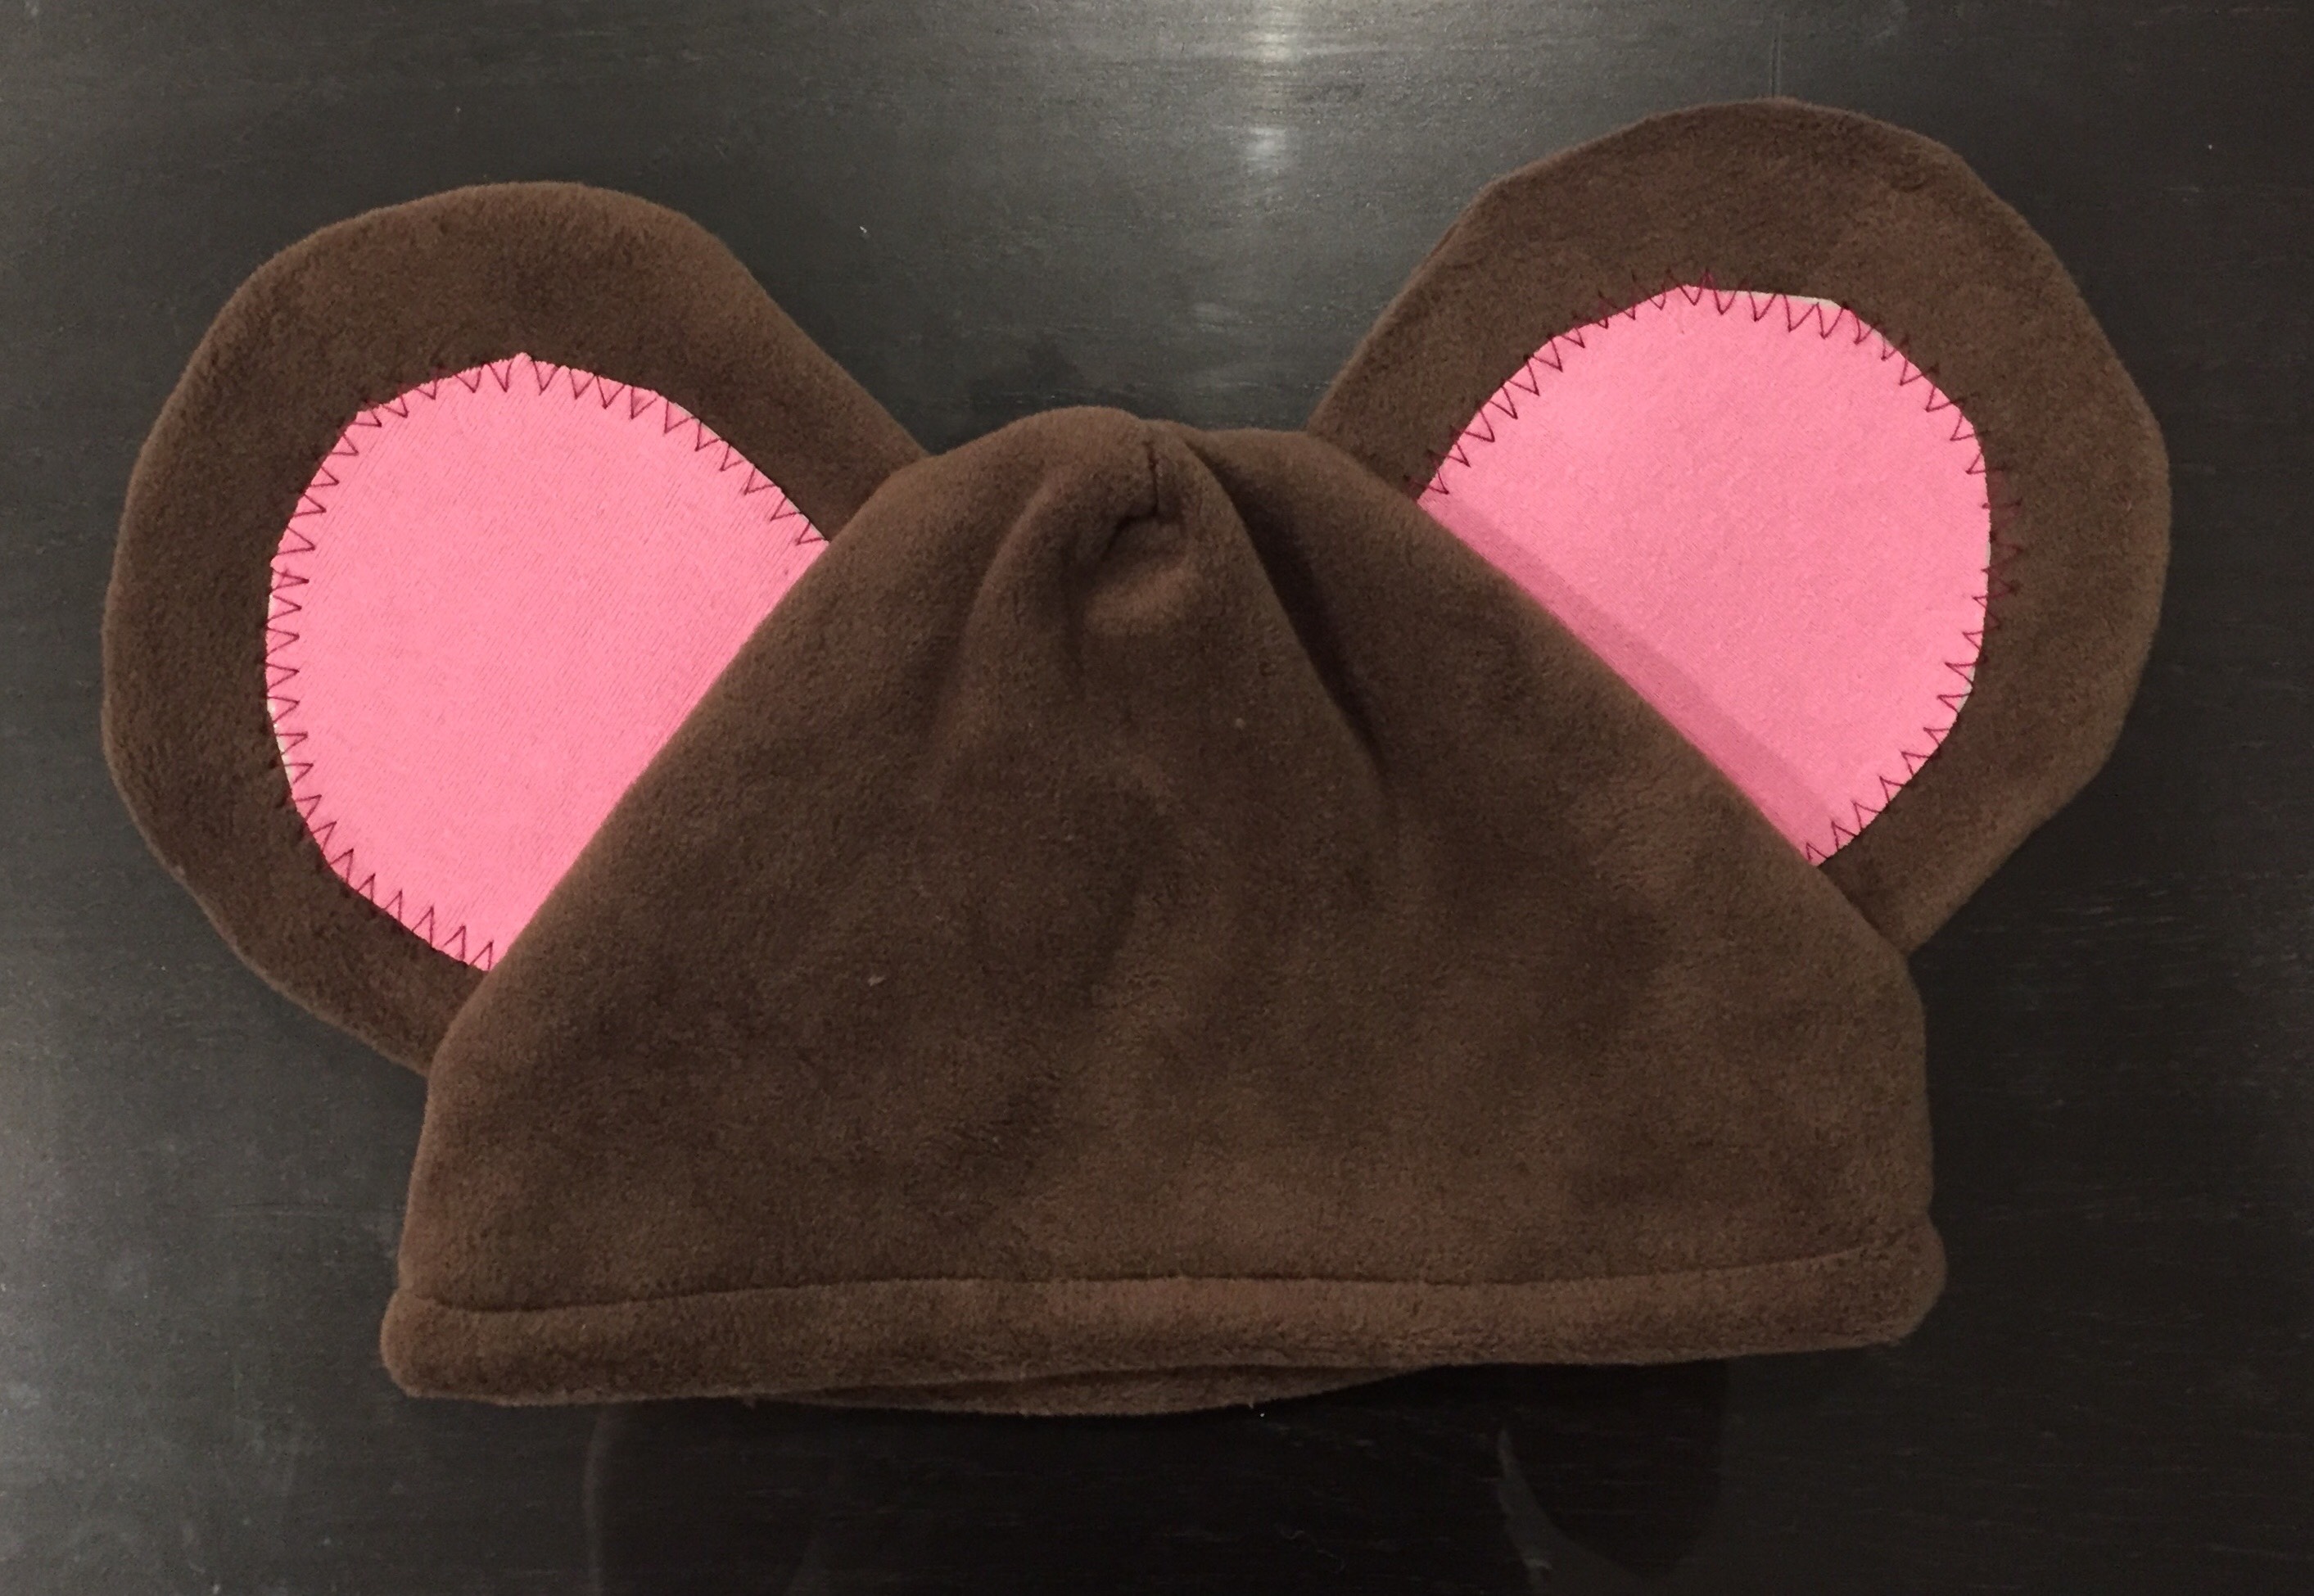
Living in Wisconsin, Halloween is generally cold — on occasion it even snows. So making sure my little is thoroughly bundled as we make the rounds to neighbors’ and grandparents’ houses is a high priority. For Halloween this year, my little girl wants to be a mouse — more specifically, a brown mouse with pink ears. SQUEAK! You got it, baby. So I got to work.
I decided to try a new kind of fleece this year, something labeled Luxe. It’s super soft and I don’t think it’ll pill, which is nice, but I also don’t imagine I’ll use it for this project again as it’s very thick which makes it a little difficult to work with on a small scale project. Standard or microfleece probably would have been better options. This isn’t something I was considering when I purchased it as I was quick to make my pick; so as always, I learned by trial and error and you get to learn from my whoopsies without making them yourself. (Lucky you!)
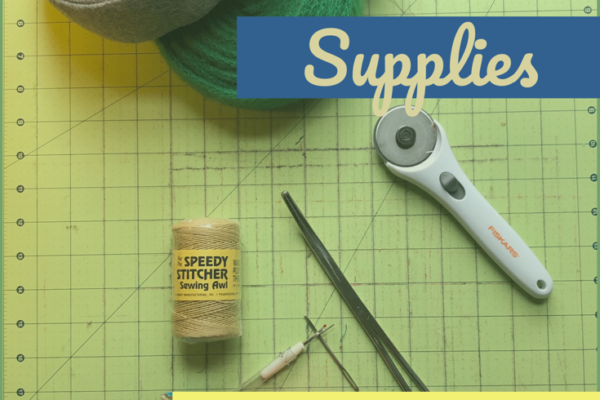
This project is super easy and versatile, as you can make almost any kind of critter you can imagine. I’ve made a Yoda hat and a bee hat; I’ve also just made plain ol’ hats. The only variation is the ears/horns/antennae. If you wanted to go for the really quick and easy approach, you could probably just make the ears with felt and glue. For the bee I just used black pipe cleaners and yellow pom poms. But with this hat, I had the time and desire to make everything from the same materials using my sewing machine, so here we go!
Step 1: Make the pattern
In general, I make my own patterns or just wing them. I’ve found that sitting with my daughter at her drawing table sometimes affords me a bit of time for my own creativity and that the giant roll of paper that feeds through it is great for this purpose. To make your pattern, you’ll need to get the circumference of your child’s head, as well as height from the crown of their head to the middle of their ears. My daughter’s measured out to 19” around and 6” high, so I created a pattern based on half the circumference + seam allowances, then height + seam allowances. When factoring heights, consider an extra 1”-3” to stitch under the brim in addition to seam allowance. After my rough calculations, this lands me at 10.5” and 7.5”. Remember, if it ends up a little big, it’s easier to fix than if it’s too small, so always err on the side of caution.
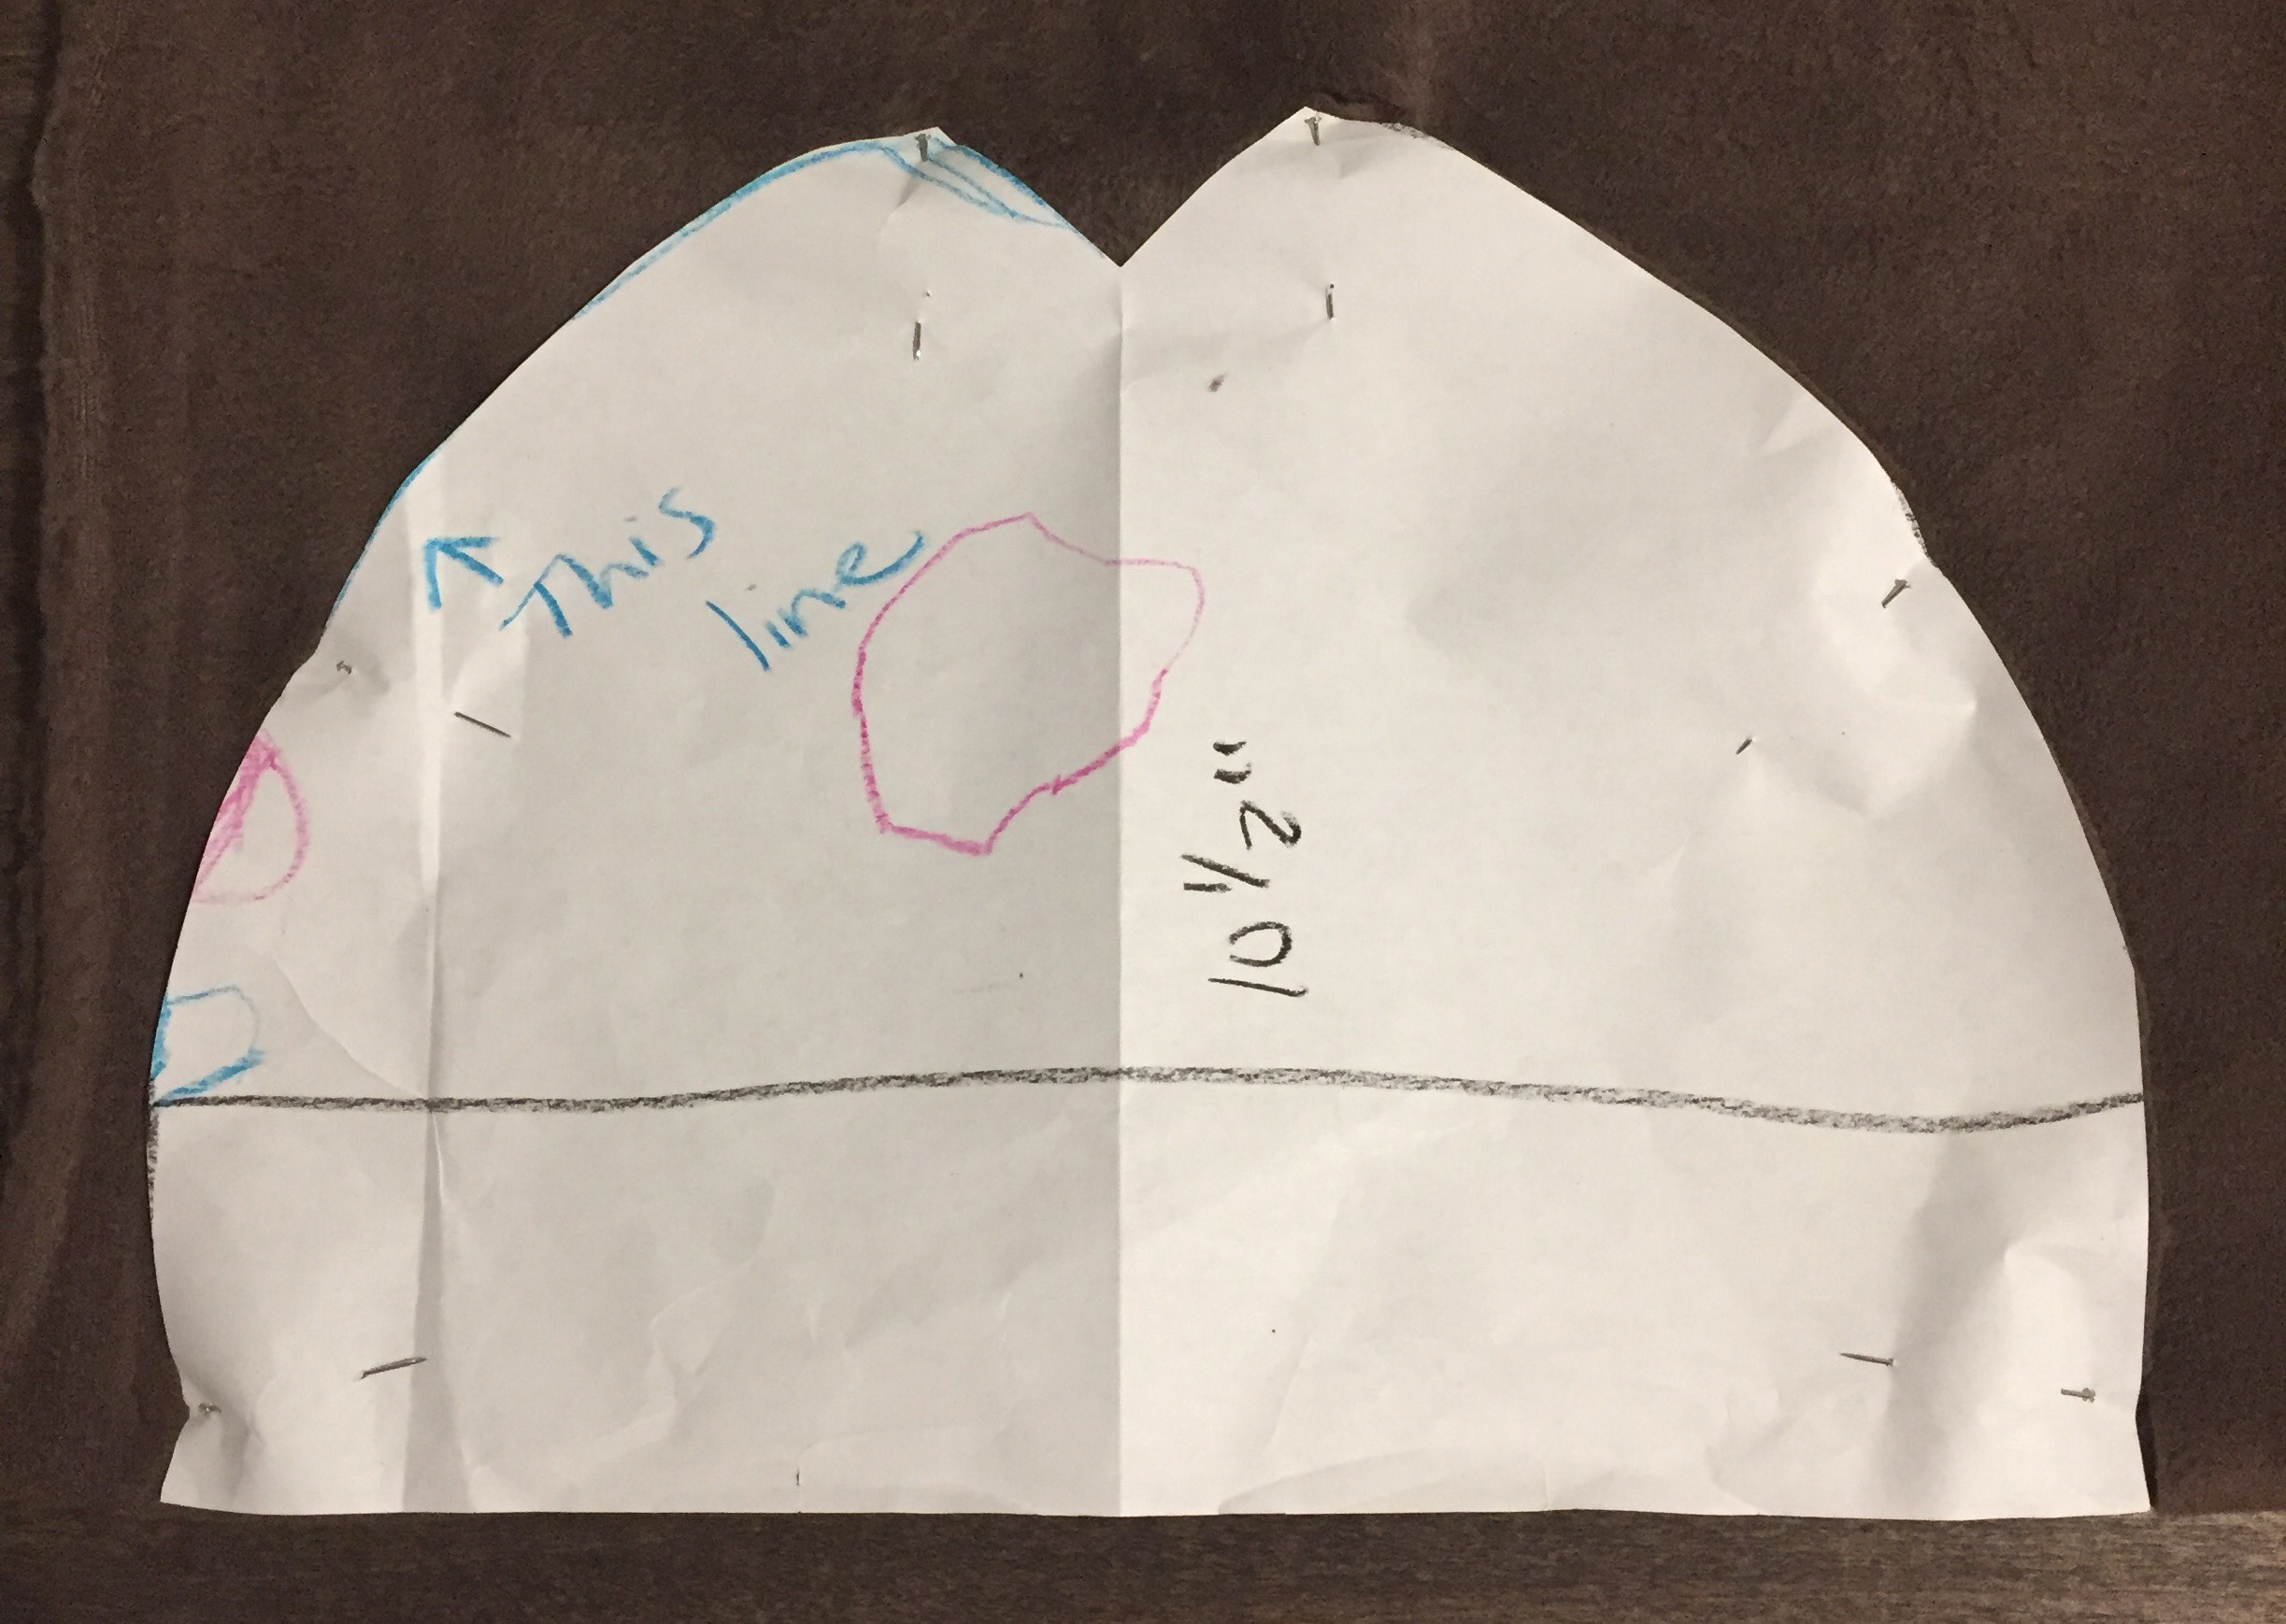
Hat pattern
To make the hat pattern, I’d recommend starting with a rectangle and then rounding off the corners. My first one ended up too pointy for the thickness of this fabric, so the hat didn’t fit right and the ears didn’t stand up properly, so I had to remake the base (watch me fix it below). I haven’t had this problem in the past and think that much of it had to do with the thickness of the fabric, particularly where the ears met the hat. Either way, no big deal — it’s a small project so a little fabric goes a long way. This also gave me a chance to add some stabilizer to the inside of the ears so they’re extra pert!
After you’ve cut out the hat shape, fold it in half and make sure the sides are even, then cut out a notch in the top. Aim for 90 degrees or bit more obtuse so there’s not too much bunching at the crown.
Appendages: Ears, horns, antennae
As far as the appendages go, just remember to factor in your seam allowance when determining your scale. For the mouse, I knew to err on the big side or else she might be mistaken for a bear with a long pink tail and whiskers….
Step 2: Cut out your pattern
Cut out your hat and appendages. Don’t forget that if you have two slightly different shapes or directions for your appendages, to make sure everything works with wrong sides together*!
- If you’re making antennae, you’ll need to make two tubes (square/rectangle, folded over and sewn shut except at the base).
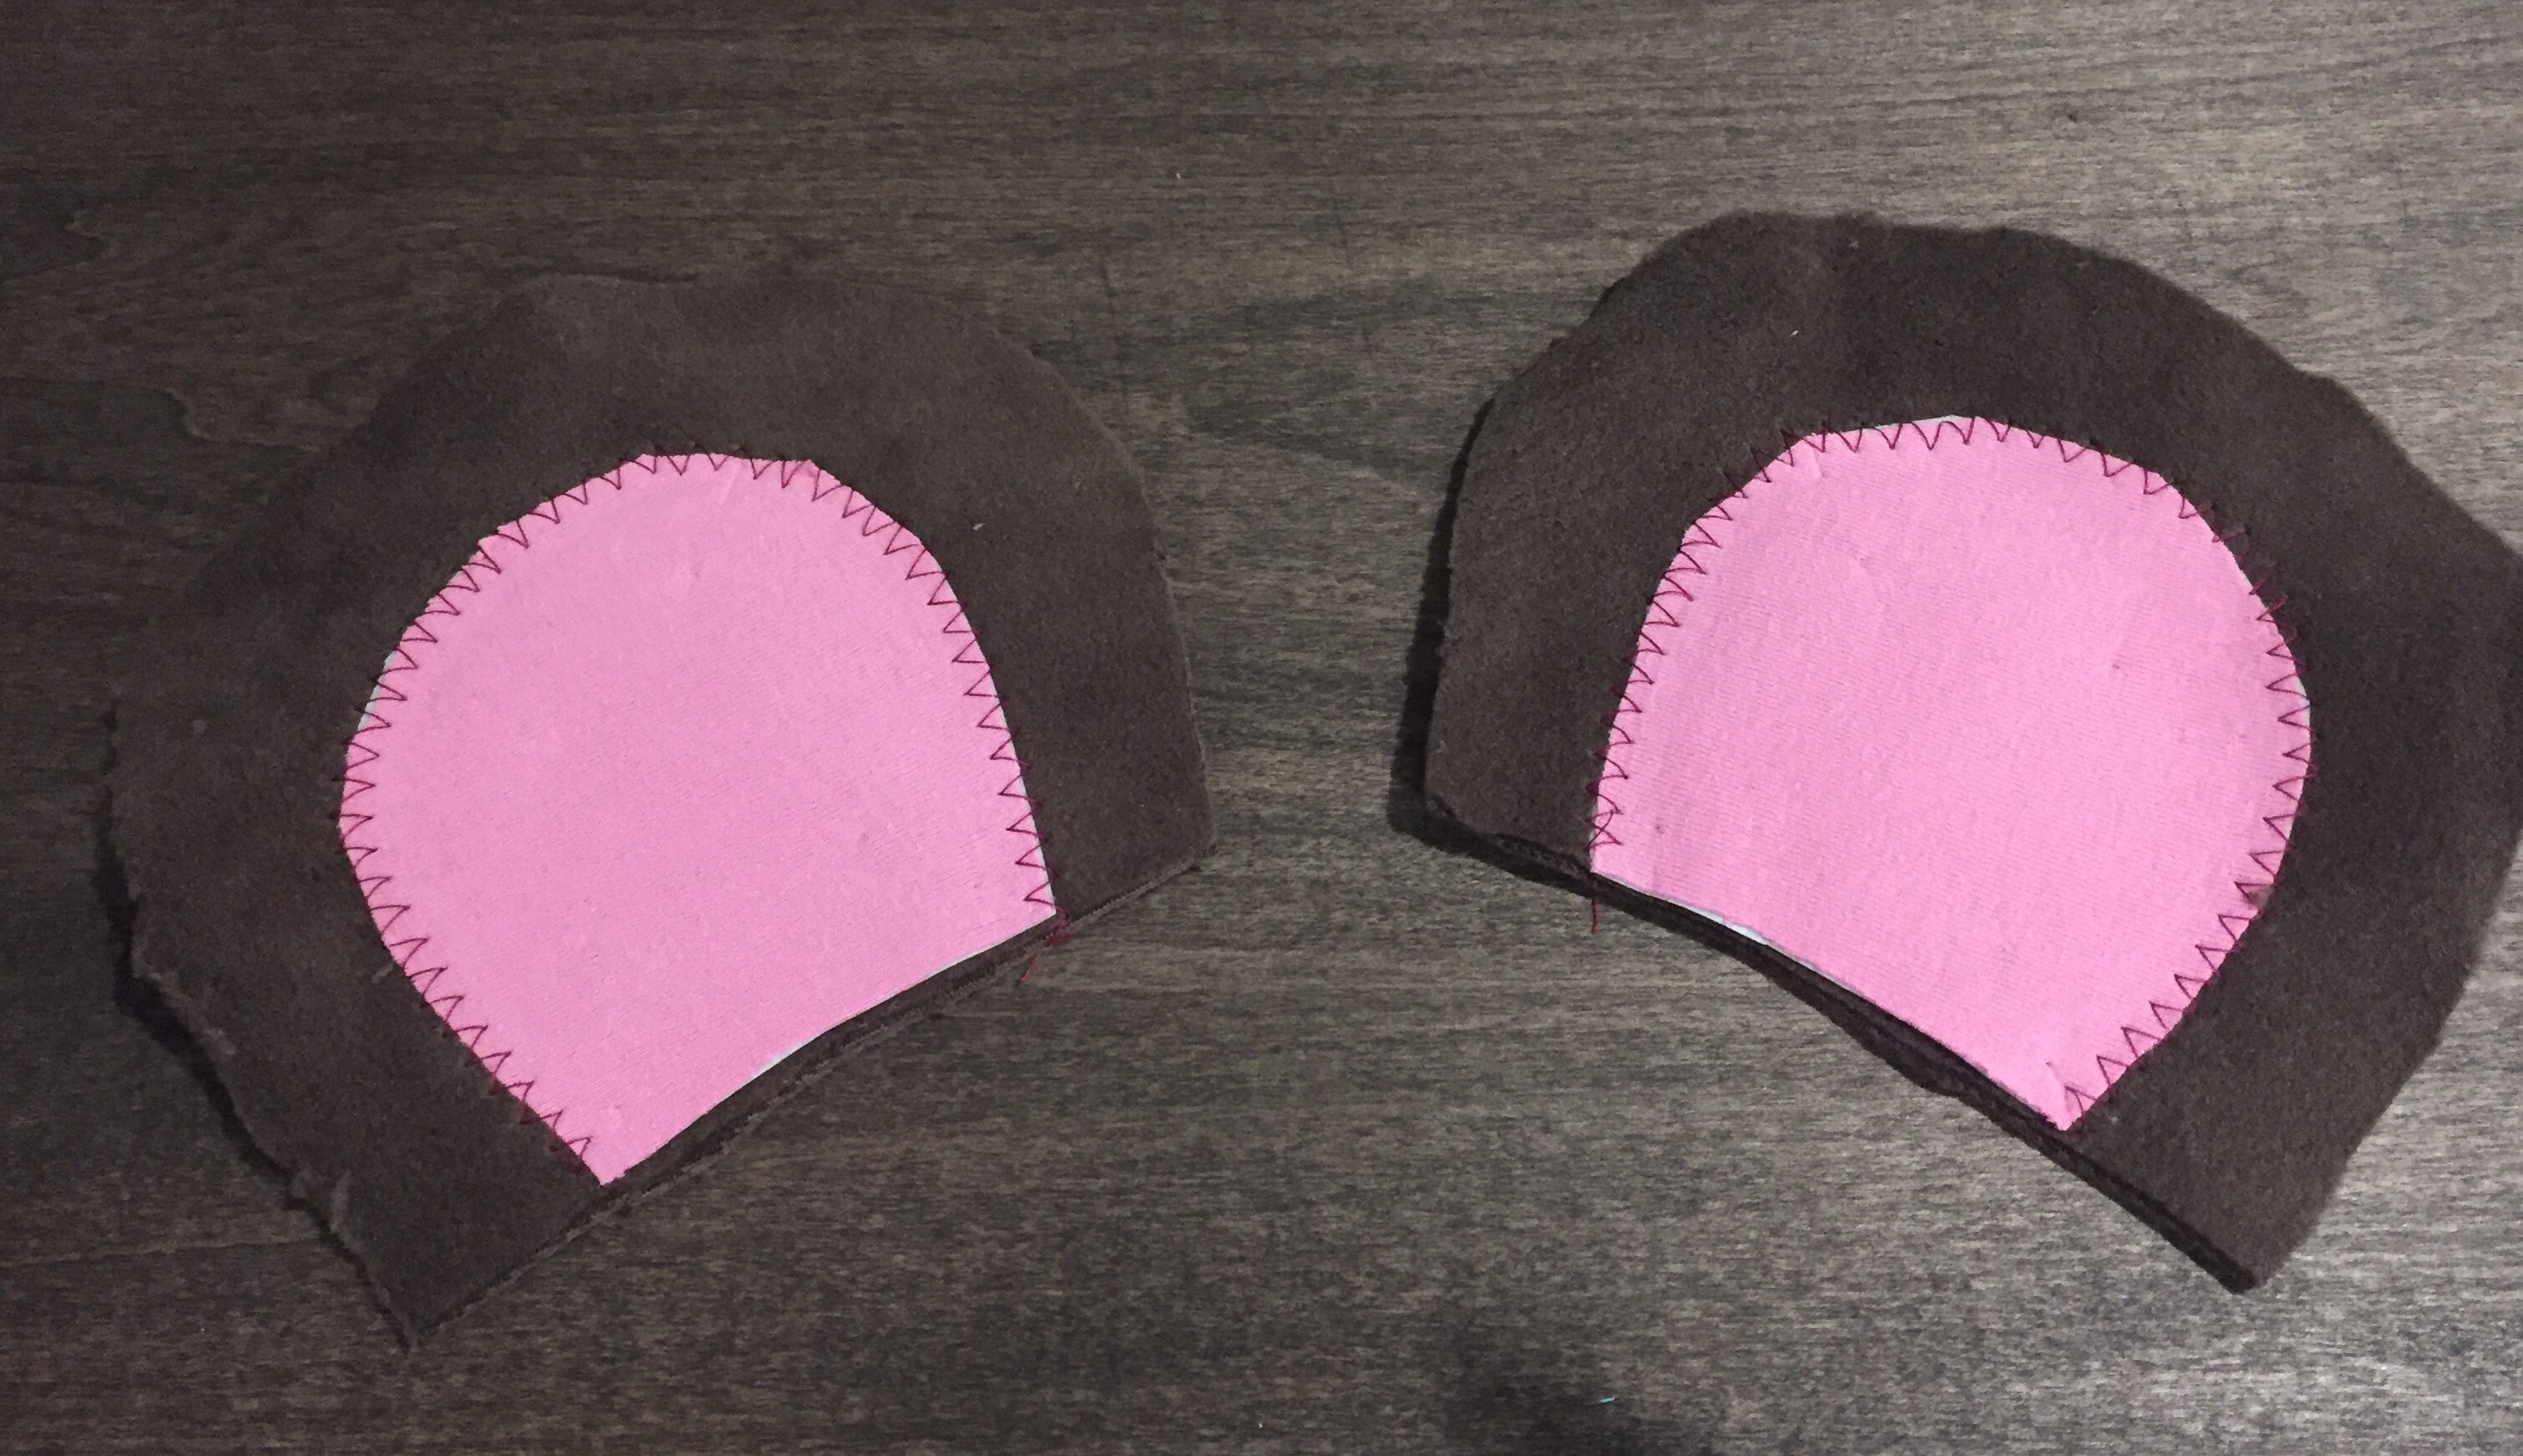
- If you’re making ears, you’ll need to cut out four (two for each direction).
- If you need a pink part to your ear, cut two of these out, too! I overlayed mine with a zigzag stitch; if you want to get fancier, I certainly won’t stop you!
- Cut and iron on stabilizer, if desired.
- If you’re making horns, you could do it either way, I suppose — tube/cylinder sewn shut or two pieces sewn together. Your desired effect will determine your method.
- If you’re using felt, just cut out two of each and glue in the pink part, if needed.
Step 3: Assemble your appendages
If you’re adding a pink part to your ears, stitch this in place first, then put your fabrics right side together, pin, and stitch. Flip right side out.
If you’re making cylinders or tubes, fold in half, stitch one side and one end shut. Don’t forget to stuff them! (I haven’t made any stuffed antennae or horns before, but I imagine that you wouldn’t want to to stitch them shut at the base, for fear they’d be floppy if you didn’t sew closely enough to the seam. I’d probably just overstuff the top and and try to reallocate the fluff once it’s attached to the hat. Perhaps consider using a stabilizer.)
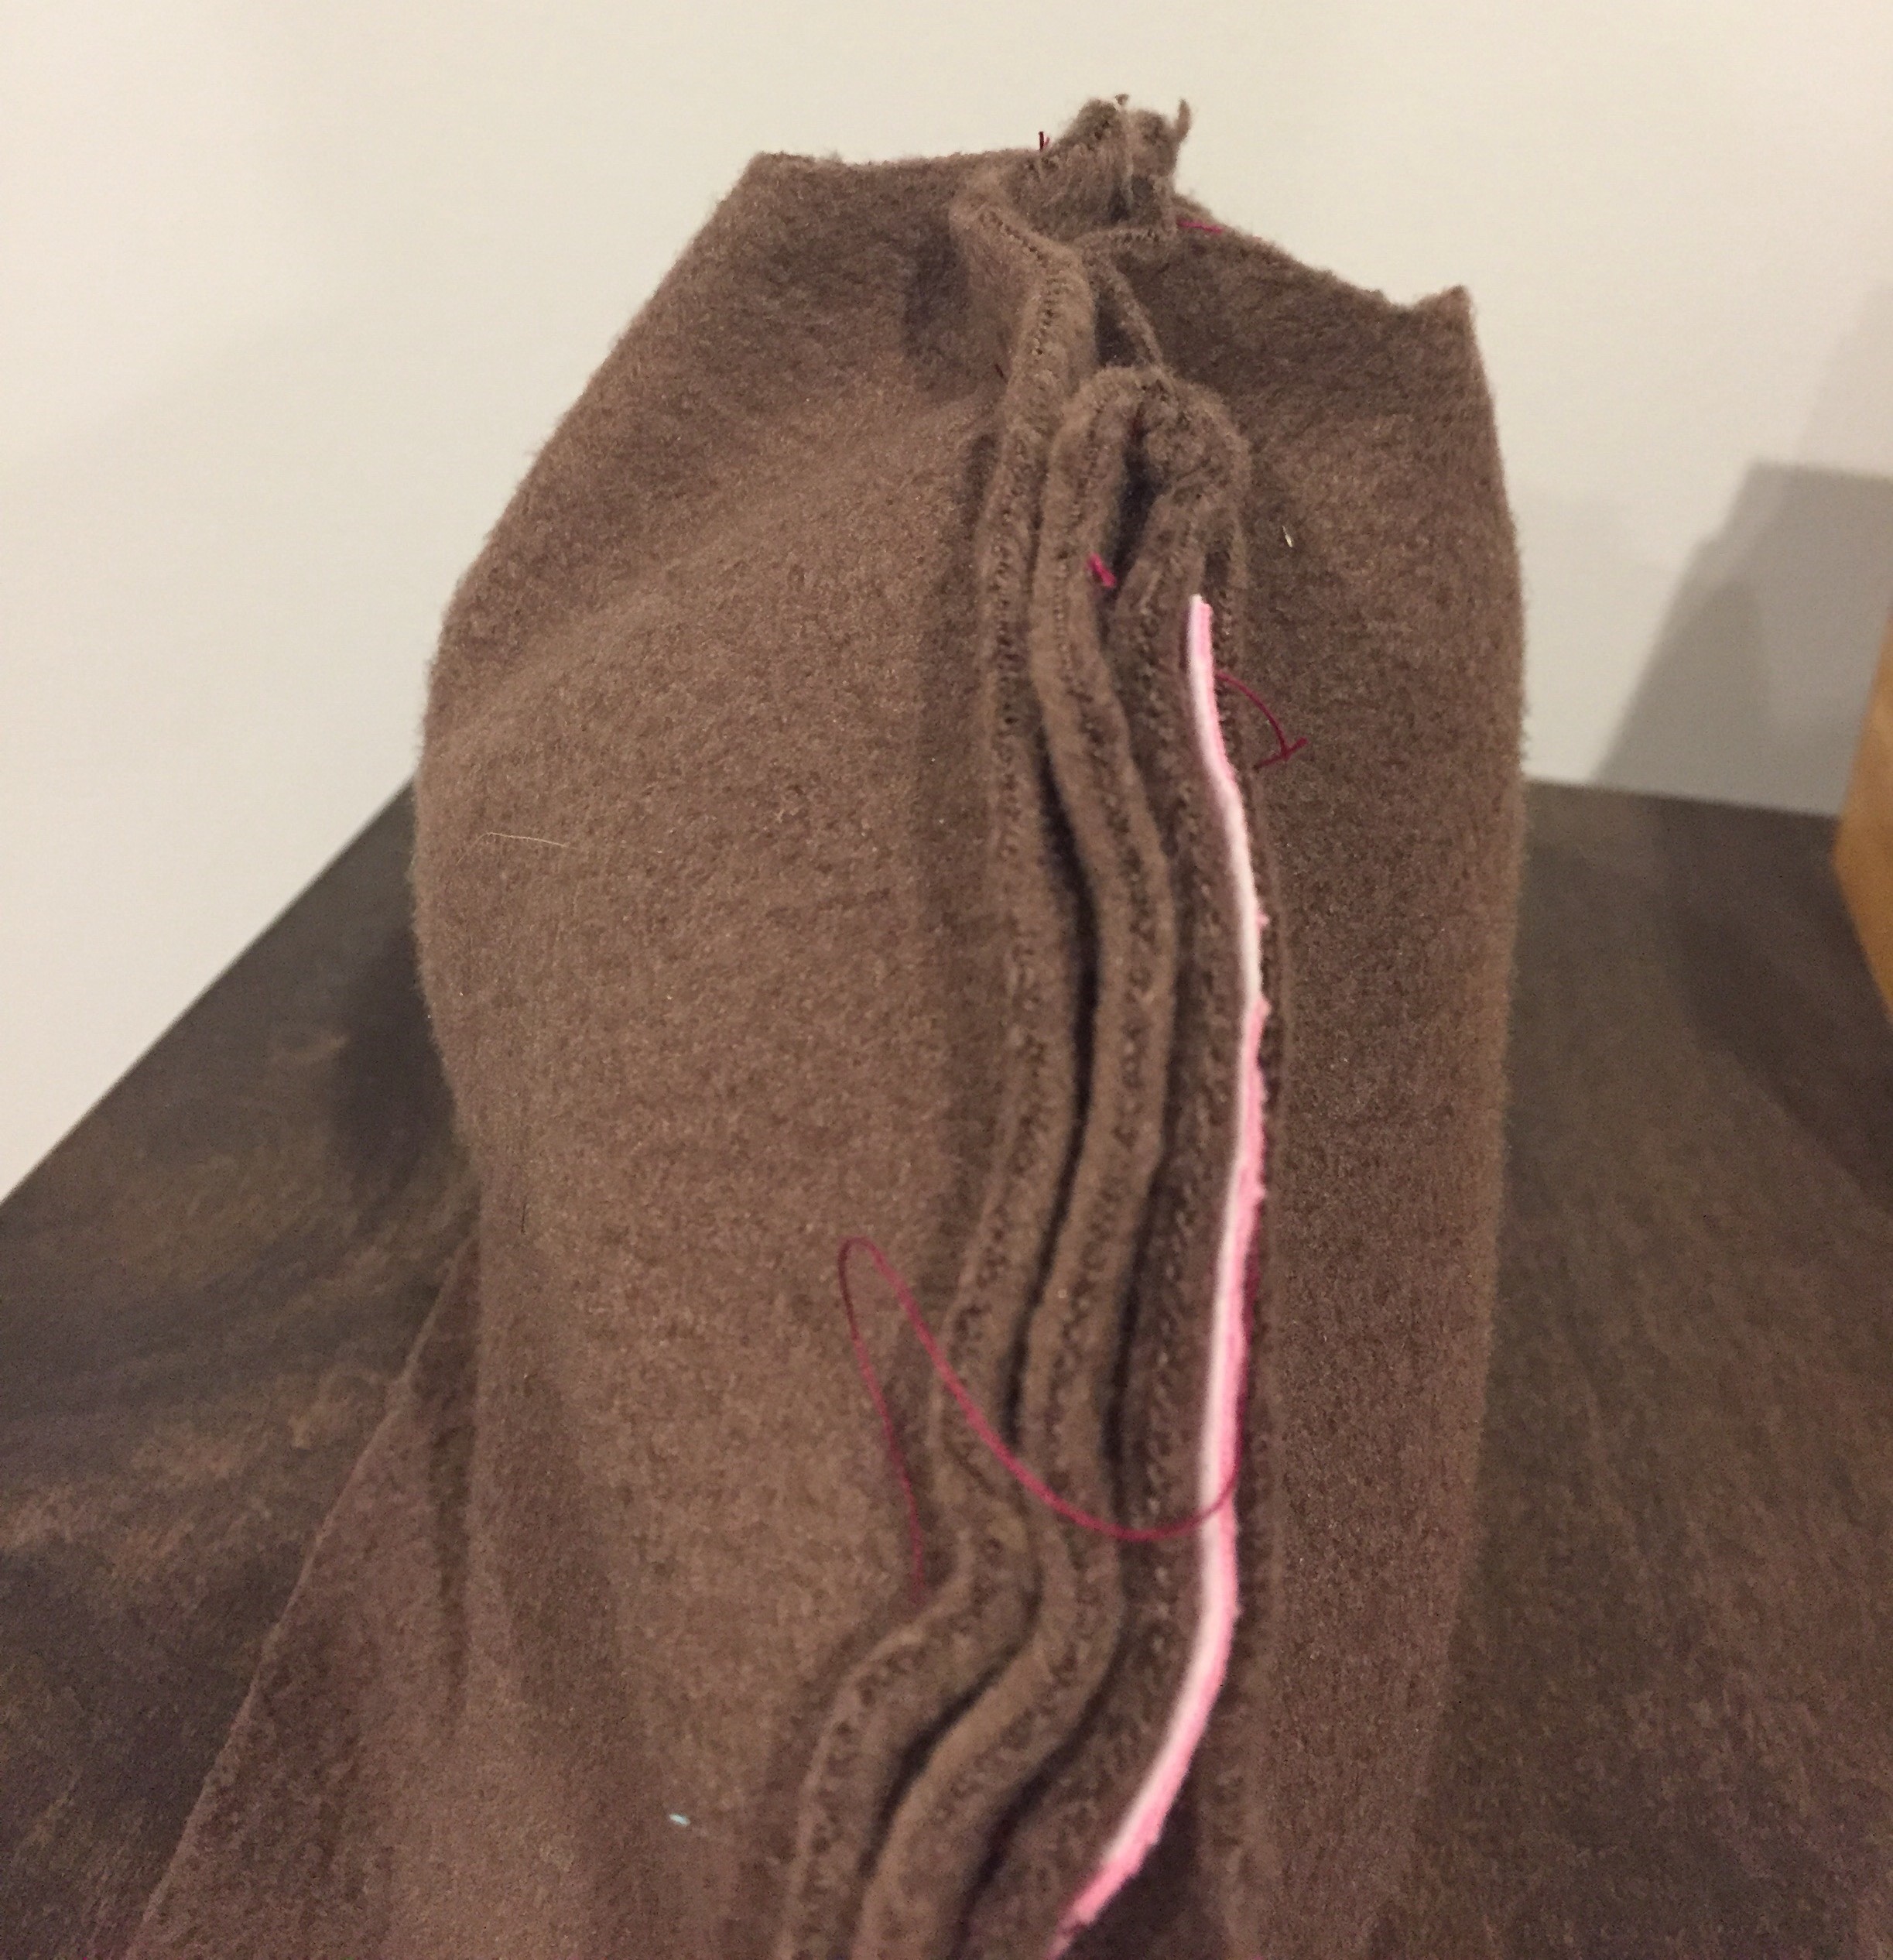
Step 4: Pin and stitch!
Lay one of your hat pieces down on your work surface right side up and place your appendages on top facing inward. Place the other side of the hat on top, right side down. Pin all the pieces in place and stitch around the outside. After you’ve stitched this part, flip your hat right side out and check to make sure your ears fall where you’d like them to by bunching the center fabric together. If everything looks good, flip back inside out and pin the opening shut, creating four (roughly) right angles and stitch shut.

Flip it right side out. We’re almost there!
At this point, you might want to try putting the hat on to make sure it’s not too wide, and to measure for height to see how much space you have to tuck the brim under before stitching it in place. If it’s too wide, just tighten up the sides a bit. When you’ve determined the amount of fabric you have to tuck under, pin in place and run a quick line around the hat. You could probably use a stretch stitch if you want to, but I’ve never had a problem with losing too much of the fleece’s stretchiness with a simple straight stitch.
Hooray! You’re done. Now watch your little enjoy their cute and fuzzy new cap.
To complete my costume, I’ll likely make pants from the same fleece and adhere a quick pink tail, then just buy a hoodie. Fingers crossed I can find one in brown.
Happy Halloween!
— Funky Crunchy Mama
*Right and wrong side together refer to the “prettier” and less pretty sides of a fabric. The prettier side (or in this case, fuzzier) is the right side.
Watch as I remake the hat to adjust to the thickness of the fleece I used.


So impressed. My sewing skills are quite limited (and I’m a perfectionist, so I tend not to do it). Your wedding dress comment made me laugh out loud. P.S. Love that shared this via youtube
Thank you!
Ha! The video was part of a blogging challenge. It’s definitely not something I would normally do, although I can see where it would have some benefit for readers and I won’t limit it out in the future. 🙂
This is so cute and crafty! I love it!!!
Thank you!