


Baby clothes! Is there anything cuter? (The answer is no.) I’ve had so many favorite pieces over the years – little things that I can hardly bear to part with, but can’t rationalize keeping. And that’s why I love to upcycle baby clothes into ornaments.
Upcycling baby clothes into ornaments is about the perfect solution for storing memories. These days, you can’t rationalize storing a pile of onesies for 20-30 years for a hypothetical situation. I remember my reaction to some of the things that my mom had stored from my childhood and I can only imagine the reaction I’d receive when handing over my favoritest orange stripes. 🧡
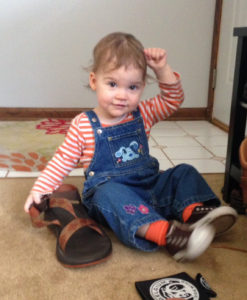
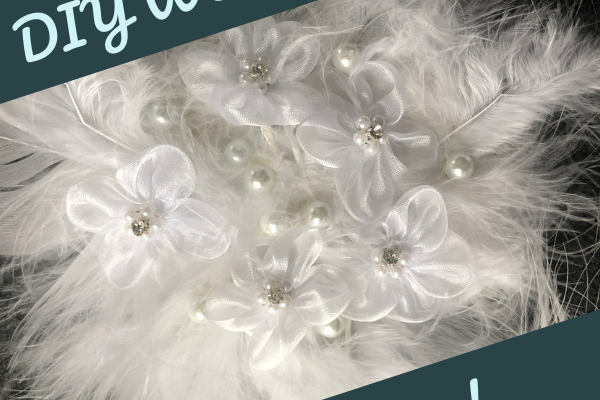
(Isn’t she cute?!)
This post contains affiliate links.
The holidays are all about family and nostalgia
I’m not shy about the fact that I don’t much care for the holidays. I truly feel like the specialness of time together is buried in stuff and feelings of family obligation. I’d much prefer a modest, handmade or secondhand gift exchange and single boisterous evening to a week-long tropical vacation and all the latest toys & gadgets.
The holidays are supposed to be about spending time with friends & family; making food & memories. So decking the halls with mementos of years past is the perfect way to honor this tradition.
Which brings me to another reason why I love these projects:
Thanks for the hand-me-downs!
Many of my kids’ clothes are hand-me-downs from our nieces and nephew, and sometimes we’re the last stop before they’ve seen their final day. Rather than drop them at a secondhand store to likely be recycled or trashed, I’d rather hang onto some sweet memories and share them with my loved ones who hold similar memories of their kids in those clothes.
And the winter holiday is the perfect time to share these.
Most of these ornament ideas are simple, no-sew projects. But there are a few tips and tricks you’ll want to know before starting.
Working with jersey knit
Many, many clothes are made out of jersey knits — especially kids’ clothes. Jersey knit (t-shirt material) poses some challenges when crafting.
The biggest challenge is that it’s simple to overstretch. If you stretch jersey knit, it can quickly warp patterns or cause edges to pucker. When doing any of these projects, you’ll want to use a stabilizer.
To be honest, I loathe working with iron-on stabilizer. (Frankly, I just hate ironing. It doesn’t matter what it is.) Fortunately, these projects are all small enough for a simple work around: adhesive felt.
Adhesive felt is a great option for this project as, in addition to being easy to work with, it also comes in all kinds of colors and patterns. This ensures both sides of your ornaments can be festive and coordinated! A single multipack of colors is a great to have on hand. You can also use them for no-sew insignia on kid’s capes and for crafting with felt stickers (hand cut or use a cutting machine, like a Cricut).
Felt ornaments
Adhere your favorite patterned pieces onto adhesive felt and cut them into trees, bells, stars, or snow people. You can do the same with seasonally appropriate screen printed or embroidered decals.
To hang, stitch a buttonhole, use a grommet, or cut a small hole or slit and thread a ribbon directly through the material.
If you have a Cricut, you could cut two rectangles — one for the back and one to frame the front. Then the Cricut can also just punch the hole for you.
Download these shapes to help with precision. They’re also very handy for cutting shapes for kids ornament busy buckets.
Stuffed socks
My daughter loved to pick out her socks in her toddler years — always two different ones. It was adorable and a really fun part of our morning routine for quite some time. I really struggled with parting with them. Fortunately, toddler socks are small enough to be an ornament on their own!
Just stuff and stitch shut.
Not partial to sewing? Hot glue will do the trick! If you opt for glue though, just don’t overstuff or the glue will be more likely to separate over the years.
Strips in glass ornaments
Cute, small patterned pieces in glass ornaments are a great way to remember those sweet outfits. Just cut it into strips and try your best to face the pattern out as you layer them into the ball.
If you’re working with a jersey material, be sure NOT to pull on the strips once cut, or they’ll roll and you’ll no longer see the pattern.
ModPodge onto glass ornaments
You can use ModPodge to adhere material to the outside of a glass ornament, as well. Stick with non-jersey materials only though.
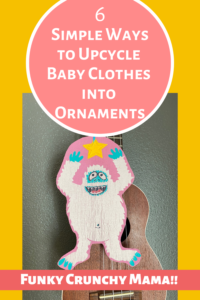
Use liquid starch to collage
If you’ve never used liquid starch, you must try it! I had some left over another project and decided to try making a cute little scene for this yeti.
Just dip the piece into the starch and let it dry on a piece of wax paper. The starch will keep the design stiff and the edges from fraying.
If you choose to layer them (as I did to make the scene), use a little craft glue to ensure longevity.
Make baby clothes candy
We’ve all used this method to wrap gifts at some point. Why not use it for ornament making, as well? A pinking shears to cut the edges, stuff with fabric scraps or maybe some of those saved baby socks. 😉 To give it a finished edge, fold it under before securing the ends. Watch me make one here!
I hope you’ve found these upcycled ornament ideas helpful! Old baby clothes can bring back so many memories and this is a great way to cherish them year after year. It’s also a great way to share them your loved ones for their trees, as well.
If you’re looking for more ideas to help make mementos for the holidays with your littles, check out my post on holiday busy buckets! We’ve been pulling ours out every year for the the last five and it’s always a great way to make memories, work on fine motor skills, and fill the time on snowy weekends.
Enjoy!
Melissa, Funky Crunchy Mama


One thought on “6 Simple Ways to Upcycle Baby Clothes into Ornaments”