

Baby hats. Could anything possibly be cuter? And the hat that baby comes home from the hospital in is a keepsake to be treasured. Unfortunately, most wind up in a bin, lost amongst other baby clothes that hold memories only to be passed on when baby has a baby of their own.
This post contains affiliate links.
My own mother kept mine in an “it’s a girl!” cigar box for three decades before it was unearthed again.
As for my own children’s hats, I imagine they’ll have as much interest in having their kids wear theirs as I did in having them wear mine. So instead, I added them to my bin of baby clothes to be crafted.
Deep down, I know it’s kinda silly to keep kids clothes. I know my kids likely won’t have an interest in them — even if the materials stand the test of time — and the memories they hold are best captured in photos. To be honest, if I didn’t have a crafty side, I’d probably try to make myself be happy with photos (I know my husband would be happy if I did), but I’m a big lover of fabrics and fiber arts, so if one of my babe’s favorite articles sparks an idea, the piece may have a future in our home.
The Project and Memories
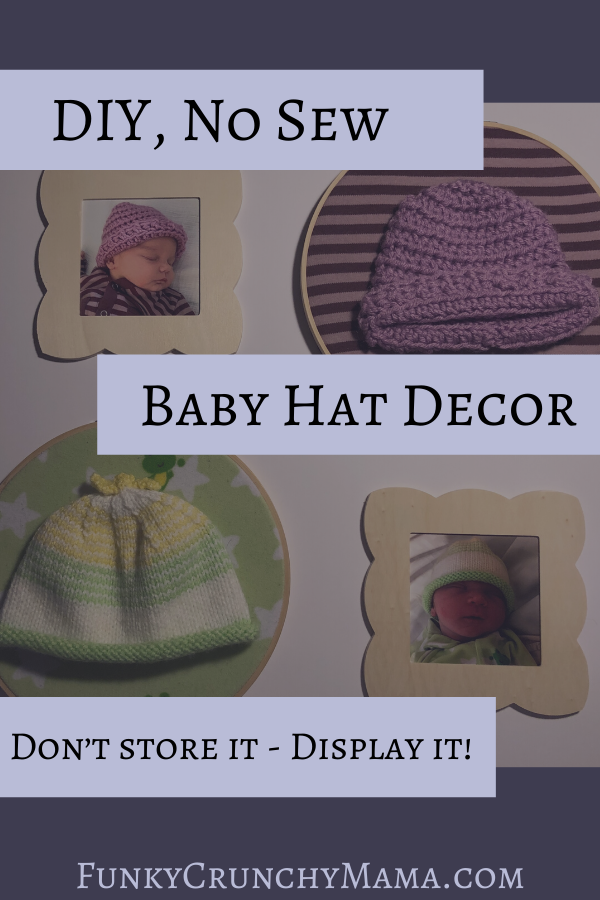
This is a super easy and inexpensive no-sew project that’s guaranteed to tug at your heartstrings every time you look it at.
I know that every time I look at the hoop of my daughter’s hat, I think about how her father always called her his little eggplant when she was wearing it. When I look at my son’s, I think of my two year old daughter singing Rock-a-bye Baby to her new brother. She picked out the sleep sack and it just happened to perfectly match the only hat the hospital had that fit his head. (Can you hear my heart fluttering?)
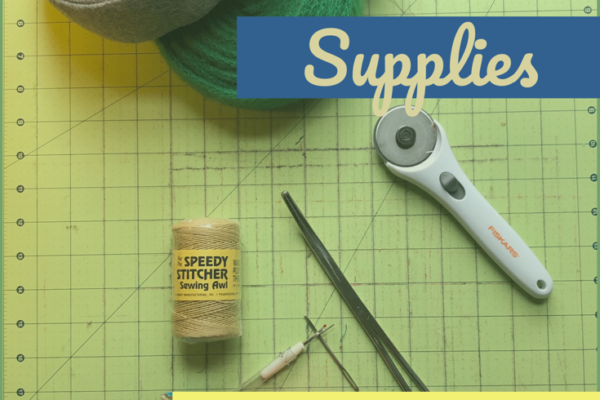
Supplies
All you need is:
9” embroidery hoop*
Stabilizer or iron-on batting (if using a stretchy material like jersey)
Safety pins
*My son had a sizable head and I may have opted for a 10” hoop if I was just doing his. Also consider the width of the material you’re using. Baby clothes clothes are so tiny; anything larger than an 8” or 9” hoop may not work out depending on the article of clothing. A 10”hoop would not have worked with my daughter’s sleep sack.
| |
|---|
Wash the garment and cut a usable section out. If you’re using stabilizer, iron in place.
Remove the inside hoop, place fabric over it, and fit the outside hoop over the top. Tighten the screw, keeping it loose enough to adjust the fabric so the pattern displays as desired. After adjusting, tighten the screw so the fabric is taut. Cut off the excess fabric.
Place hat in desired location and pin in place at the top and sides.
Hang. If desired, tie a bow or hang a bauble or charm over the nail head to keep it hidden.
Variations
The hat in the embroidery hoop alone is absolutely adorable, but I wanted something that would take up just a little more wall space than two hoops, so I found some small, simple unfinished wood frames and printed off some photos of my babes in their hats and sleep sacks. Other things I considered including were their birth cards, their footprints, or embroidering their names & birth stats in either the same hoop or in a separate hoop or frame. I even considered pinning on their hospital bracelets.
| |
|---|---|
| |
What about your baby’s hat? What memory surfaces when you see it? I’d love a collection of memories in the comments below. <3
— Funky Crunchy Mama