


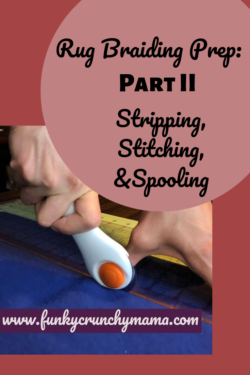
This is the fourth post in a seven post series on wool rug braiding. Other posts include Supplies & Wool Basics, Planning Your Braided Wool Rug, Disassembly & Felting, Starting Your Braided Wool Rug, Lacing Your Braided Wool Rug, and Finishing & Care.
Have I mentioned how much I love rug braiding? I think I have. Did I already say I have a favorite step? ‘Cause if I didn’t, then this is it. (Okay, I really love them all equally, but for different reasons.)
The reason I love shopping for material is for the thrill of the hunt. Nothing beats a great piece at an even better price.
I love disassembling ‘cause ripping things apart at the seams is therapeutic; and felting because nothing beats warm wool out for the dryer and the sound of the static electricity as you pull the scraps apart.
I think the reason I love this step has to do with the clean workspace, the baskets, and watching the accumulation of prepared material.
What are the steps? I call them stripping, stitching, and spooling.
This post contains affiliate links.
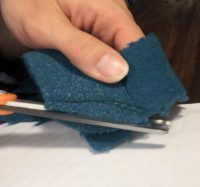
Stripping
For stripping your material you’ll want a rotary cutter and mat. You can use a sharp scissors, but the task will go SO much more quickly and you’ll have a more consistent final product with a rotary cutter. Frankly, the task will also be that much more enjoyable with the right tools.
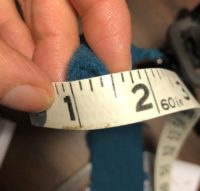
The goal with cutting strips is to be able to make a rope-like roll, similar to making bias tape. The final roll should be about ½” in diameter. Depending on the thickness of your wool, you’ll want to want to cut them between 1 ¾” – 2 ½ “. If you have a light-weight piece of wool that doesn’t achieve the desired thickness, you’ll want to stuff it, so leave enough room to fill the width with scrap wool and to leave a finished/folded edge. Don’t waste your color or pattern cutting it wider; there’ll be plenty of scrap left to stuff when you’re done with this step.

Stitching
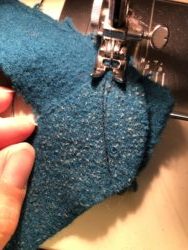
The goal is to make one long line of wool out of which you can create your rope for braiding. For this step, you’ll need a sewing machine. This does not take any sewing talent, but completing this step by hand stitching would take ages, and you likely would not achieve a tight enough stitch. If you don’t have a sewing machine, ask around. Chances are good you know someone who has one that they’re not using or know someone who has an extra. If not, check your local thrift shop.
To stitch your strips together, put right sides together and sew (using a straight stitch) at an angle; reverse, and stitch over it again. Clip the excess from the corner.
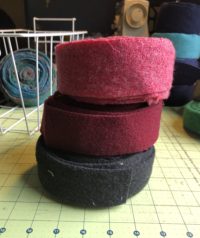
Spooling
After stitching together a couple dozen or so strips of wool, start creating your first spool! (Did I mention that this is my favorite step?) Generally, I don’t bind my spools until I start to use them, but I recently heard a good tip: start your spool with a rubber band to keep it from unrolling as you work. (More on this later.) When you’re done spooling, you should have a heap of wool that looks a bit like this.
I hope you’re still enjoying this process! What’s been your favorite step so far? I’d love to learn about it in the comments below. 🙂
— Funky Crunchy Mama


Great tips, thank you!
Do we cut our strips on the bias?
Hi! Good question! I’m usually too focused on maximizing the fiber acquired from a piece more so than how it’s cut.
But also, I feel like if it’s felted (washed/dried), this reduces the flex, so how it’s cut is less of a concern.